セキュリティ診断サービス「virustotal」

セキュリティ診断サービス「virustotal」
https://www.virustotal.com/ja/

ITProで紹介されていたのでメモ。

約50個のエンジンで脅威をチェックできるGoogle提供のセキュリティ診断サービス
http://itpro.nikkeibp.co.jp/atcl/column/14/538255/102900008/?ST=system&P=1

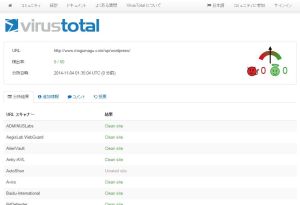
実際に自分のブログを診断してみたけど
50個のエンジンでチェックしている割には
結果が出るのが早い。
virustotal_result

営業さんに教えておこう。

MacBookAirにIntelliJとMavenとSelenium入れて初めてのTest実行

会社で同僚にIntelliJのCommunity Editionなら無料で簡単に
Seleniumインストールして実行出来るよと聞いたので早速実行。

とりあえず環境が全然整っていないので動かすまでのメモを残す。

インストールするもの

  • jdk1.8
  • maven3
  • Firefox(テスト実行用ブラウザ)
  • IntelliJ IDEA13 Community Edition

jdkは1.6が入っていたけど新しいのを入れたかったので以下のサイト
を参考に1.8をインストールし、切り替えて使用。

MacにJava(JDK)をインストール
http://qiita.com/ryo0301/items/3c9a02e03b4e9a41f576

その結果

[22:30:42 mogu(Macintosh.local) ]$ echo $JAVA_HOME

[22:44:09 mogu(Macintosh.local) ]$ /usr/libexec/java_home -V
Matching Java Virtual Machines (3):
    1.8.0_25, x86_64:	"Java SE 8"	/Library/Java/JavaVirtualMachines/jdk1.8.0_25.jdk/Contents/Home
    1.6.0_65-b14-462, x86_64:	"Java SE 6"	/System/Library/Java/JavaVirtualMachines/1.6.0.jdk/Contents/Home
    1.6.0_65-b14-462, i386:	"Java SE 6"	/System/Library/Java/JavaVirtualMachines/1.6.0.jdk/Contents/Home

/Library/Java/JavaVirtualMachines/jdk1.8.0_25.jdk/Contents/Home
[22:44:13 mogu(Macintosh.local) ]$ export JAVA_HOME=`/usr/libexec/java_home -v 1.8`
[22:45:07 mogu(Macintosh.local) ]$ echo $JAVA_HOME
/Library/Java/JavaVirtualMachines/jdk1.8.0_25.jdk/Contents/Home
[22:45:23 mogu(Macintosh.local) ]$ java -version
java version "1.8.0_25"
Java(TM) SE Runtime Environment (build 1.8.0_25-b17)
Java HotSpot(TM) 64-Bit Server VM (build 25.25-b02, mixed mode)

こんな感じになりました。

続いてMaven3は以下のサイトを参考にインストール

Maven導入メモ[Win,Mac]
http://qiita.com/chonan211/items/1472198165442e93047e

[22:45:32 mogu(Macintosh.local) ]$ brew install maven
Warning: You have not agreed to the Xcode license.
Builds will fail! Agree to the license by opening Xcode.app or running:
    xcodebuild -license
==> Downloading http://www.apache.org/dyn/closer.cgi?path=maven/maven-3/3.0.5/binaries/apache-maven-3.0.5-bin.tar.gz
==> Best Mirror http://ftp.riken.jp/net/apache/maven/maven-3/3.0.5/binaries/apache-maven-3.0.5-bin.tar.gz
######################################################################## 100.0%
/usr/local/Cellar/maven/3.0.5: 40 files, 5.7M, built in 22 seconds
[22:46:47 kazuya(Macintosh.local) ]$ mvn --version
Apache Maven 3.0.5 (r01de14724cdef164cd33c7c8c2fe155faf9602da; 2013-02-19 22:51:28+0900)
Maven home: /usr/local/Cellar/maven/3.0.5/libexec
Java version: 1.8.0_25, vendor: Oracle Corporation
Java home: /Library/Java/JavaVirtualMachines/jdk1.8.0_25.jdk/Contents/Home/jre
Default locale: ja_JP, platform encoding: UTF-8
OS name: "mac os x", version: "10.9.5", arch: "x86_64", family: "mac"

続いてFirefoxとIntelliJのインストール。
これは公式サイトにいってそれぞれインストールするだけ。

Firefox
https://www.mozilla.org/ja/firefox/new/

IntelliJ
https://www.jetbrains.com/idea/download/

次はSeleniumのインストールだけど、これは解説動画をみて
やりました。IntelliJでMavenを使ってのSeleniumのインストールと
簡単なテストの実行方法が解説されてます。

これでSeleniumの実行環境が整いました。めでたし。

FuelPHPのRestコントローラでBackbone.jsからPOSTのデータを受け取る方法

今頃「Backbone.jsアプリケーション開発ガイド」を
写経してみているのですが、チュートリアル2
「ライブラリ(RESTを使ったBackbone.jsアプリケーション)」
ではまったのでメモ。

バックエンドをFuelPHPのRestコントローラで
記述していたのですが、Backbone側でcollection.create(model.save)した
際に$_POSTが空っぽでデータが受け取れなかった。

調べてみると同様の症状を発見。

Backbone.emulateJSON = true;

上記を記述すればバックエンド側で以下のように取得できるようになった。

$model = json_decode(Input::post('model'));

Backbone.jsには以下のように書いてありました。

// Turn on `emulateJSON` to support legacy servers that can't deal with direct
// `application/json` requests ... will encode the body as
// `application/x-www-form-urlencoded` instead and will send the model in a
// form param named `model`.
Backbone.emulateJSON = false;

■参考URL
Backbone.js Model.save()によるPOSTデータをPHPで読み込む
FuelPHP application with Backbone.js model.save()
Backbone.SyncでSAStrutsにFormをPOSTする方法
Backbone.jsを使ってみた

CentOS5 CentOS6 LFTPバージョンアップ手順

CentOS5 CentOS6 LFTPバージョンアップ手順

CentOS5やCentOS6のyumで入る
lftpが古いのでrpmを見つけて
手動でインストールする方法。

※自己責任でおねがいします。

lftpのサイトはこちら

1.lftpのバージョンを確認

# lftp --version

2.32bitか64bitなのか確認

# uname -a

3.以下のページでOS、バージョンに合うrpmを取得
http://pkgs.repoforge.org/lftp/

4.入っているlftpを消す

# rpm -e lftp 

5.落としてきたrpmをインストール

# rpm -ivh lftp-4.4.0-1.el5.rfx.i386.rpm

6.lftpのバージョンを再度確認

# lftp --version

MySQLをrpmでインストールする

MySQLをrpmでインストールする

ローカル開発環境で色々なバージョンのmysqlをインストールすることになったのでメモ。

■今入っているmysqlを確認する。

# rpm -qa|grep mysql

■既に入っているmysqlを削除する

# yum remove mysql-*

■インストールしたいバージョンのmysqlを探す

Download MySQL Community Server

MySQL Community Server (Archived Versions)

■作業フォルダにインストールしたいバージョンをダウンロードしてくる

# wget http://dev.mysql.com/get/Downloads/MySQL-5.1/MySQL-5.1.73-1.glibc23.x86_64.rpm-bundle.tar

■解凍する

# tar xvfp MySQL-5.1.73-1.glibc23.x86_64.rpm-bundle.tar 
MySQL-server-5.1.73-1.glibc23.x86_64.rpm
MySQL-shared-compat-5.1.73-1.glibc23.x86_64.rpm
MySQL-debuginfo-5.1.73-1.glibc23.x86_64.rpm
MySQL-embedded-5.1.73-1.glibc23.x86_64.rpm
MySQL-devel-5.1.73-1.glibc23.x86_64.rpm
MySQL-client-5.1.73-1.glibc23.x86_64.rpm
MySQL-test-5.1.73-1.glibc23.x86_64.rpm
MySQL-shared-5.1.73-1.glibc23.x86_64.rpm

■yum localinstallでまとめてインストールする
※バージョンのところとかは適宜変更。

# yum localinstall MySQL-{client,devel,server,shared-compat}-5.1.73-1.glibc23.x86_64.rpm
Loaded plugins: fastestmirror, versionlock
Setting up Local Package Process
Examining MySQL-client-5.1.73-1.glibc23.x86_64.rpm: MySQL-client-5.1.73-1.glibc23.x86_64
Marking MySQL-client-5.1.73-1.glibc23.x86_64.rpm to be installed
Loading mirror speeds from cached hostfile
 * base: ftp.riken.jp
 * epel: ftp.jaist.ac.jp
 * extras: ftp.riken.jp
 * updates: ftp.riken.jp
Examining MySQL-devel-5.1.73-1.glibc23.x86_64.rpm: MySQL-devel-5.1.73-1.glibc23.x86_64
Marking MySQL-devel-5.1.73-1.glibc23.x86_64.rpm to be installed
Examining MySQL-server-5.1.73-1.glibc23.x86_64.rpm: MySQL-server-5.1.73-1.glibc23.x86_64
Marking MySQL-server-5.1.73-1.glibc23.x86_64.rpm to be installed
Examining MySQL-shared-compat-5.1.73-1.glibc23.x86_64.rpm: MySQL-shared-compat-5.1.73-1.glibc23.x86_64
Marking MySQL-shared-compat-5.1.73-1.glibc23.x86_64.rpm to be installed
Resolving Dependencies
--> Running transaction check
---> Package MySQL-client.x86_64 0:5.1.73-1.glibc23 will be installed
---> Package MySQL-devel.x86_64 0:5.1.73-1.glibc23 will be installed
---> Package MySQL-server.x86_64 0:5.1.73-1.glibc23 will be installed
---> Package MySQL-shared-compat.x86_64 0:5.1.73-1.glibc23 will be installed
--> Finished Dependency Resolution

Dependencies Resolved

=============================================================================================================================================================
 Package                            Arch                  Version                          Repository                                                   Size
=============================================================================================================================================================
Installing:
 MySQL-client                       x86_64                5.1.73-1.glibc23                 /MySQL-client-5.1.73-1.glibc23.x86_64                        16 M
 MySQL-devel                        x86_64                5.1.73-1.glibc23                 /MySQL-devel-5.1.73-1.glibc23.x86_64                         30 M
 MySQL-server                       x86_64                5.1.73-1.glibc23                 /MySQL-server-5.1.73-1.glibc23.x86_64                        38 M
 MySQL-shared-compat                x86_64                5.1.73-1.glibc23                 /MySQL-shared-compat-5.1.73-1.glibc23.x86_64                7.0 M

Transaction Summary
=============================================================================================================================================================
Install       4 Package(s)

Total size: 91 M
Installed size: 91 M
Is this ok [y/N]: y
Downloading Packages:
Running rpm_check_debug
Running Transaction Test
Transaction Test Succeeded
Running Transaction
  Installing : MySQL-client-5.1.73-1.glibc23.x86_64                                                                                                      1/4 
  Installing : MySQL-server-5.1.73-1.glibc23.x86_64                                                                                                      2/4 
  Installing : MySQL-devel-5.1.73-1.glibc23.x86_64                                                                                                       3/4 
  Installing : MySQL-shared-compat-5.1.73-1.glibc23.x86_64                                                                                               4/4 
  Verifying  : MySQL-shared-compat-5.1.73-1.glibc23.x86_64                                                                                               1/4 
  Verifying  : MySQL-devel-5.1.73-1.glibc23.x86_64                                                                                                       2/4 
  Verifying  : MySQL-server-5.1.73-1.glibc23.x86_64                                                                                                      3/4 
  Verifying  : MySQL-client-5.1.73-1.glibc23.x86_64                                                                                                      4/4 

Installed:
  MySQL-client.x86_64 0:5.1.73-1.glibc23                   MySQL-devel.x86_64 0:5.1.73-1.glibc23            MySQL-server.x86_64 0:5.1.73-1.glibc23           
  MySQL-shared-compat.x86_64 0:5.1.73-1.glibc23           

Complete!

■既存の残骸が無いように消しておく

# cd /var/lib/mysql/
# pwd
/var/lib/mysql
# rm -rf ./*

■「mysql_install_db」コマンド実行

# mysql_install_db --datadir=/var/lib/mysql --user=mysql
WARNING: The host 'vagrant-centos65.vagrantup.com' could not be looked up with resolveip.
This probably means that your libc libraries are not 100 % compatible
with this binary MySQL version. The MySQL daemon, mysqld, should work
normally with the exception that host name resolving will not work.
This means that you should use IP addresses instead of hostnames
when specifying MySQL privileges !
Installing MySQL system tables...
OK
Filling help tables...
OK

To start mysqld at boot time you have to copy
support-files/mysql.server to the right place for your system

PLEASE REMEMBER TO SET A PASSWORD FOR THE MySQL root USER !
To do so, start the server, then issue the following commands:

/usr/bin/mysqladmin -u root password 'new-password'
/usr/bin/mysqladmin -u root -h vagrant-centos65.vagrantup.com password 'new-password'

Alternatively you can run:
/usr/bin/mysql_secure_installation

which will also give you the option of removing the test
databases and anonymous user created by default.  This is
strongly recommended for production servers.

See the manual for more instructions.

You can start the MySQL daemon with:
cd / ; /usr/bin/mysqld_safe &

You can test the MySQL daemon with mysql-test-run.pl
cd //mysql-test ; perl mysql-test-run.pl

Please report any problems with the /usr/bin/mysqlbug script!

■起動

# service mysql start

■パスワード設定

# /usr/bin/mysqladmin -u root password 'パスワード'

■「mysql_secure_installation」コマンドを実行

# /usr/bin/mysql_secure_installation

■mysqlに接続してざっくり設定する。(ローカル用)

mysql> select user, host from mysql.user;
mysql> grant all privileges on *.* to root@'192.168.%' identified by 'パスワード';
mysql> flush privileges;

■文字コードとか設定する
ゴニョゴニョ。
バージョンによる。

■設定変えたので再起動

# service mysql restart

■サービスに登録する

■参考URL

http://www.torutk.com/projects/swe/wiki/CentOS_6%E3%81%A7MySQL_56%E3%82%92%E3%82%A4%E3%83%B3%E3%82%B9%E3%83%88%E3%83%BC%E3%83%AB
http://blog.r-unit.co.jp/archives/964
http://d.hatena.ne.jp/tetsuyai/20110418/1303133792
http://qiita.com/840_/items/06f32fecbe57c3fdf5ec
http://www.infoscoop.org/blogjp/2012/04/18/mysql5-5/

Fatal error: Can’t open and lock privilege tables: Table ‘mysql.host’ doesn’t exist


http://d.hatena.ne.jp/tomoyamkung/20081225/1230165109
http://dev.mysql.com/doc/refman/5.1/ja/mysql-install-db.html
【openVZ】のnumprocをあげる

openVZのnumprocをあげる。。

どうもnumprocあたりの制限に引っかかった模様なので引き上げる。

とりあえず平時のサーバの状態をメモ(コンテナ側)

[root@***** ~]# cat /proc/user_beancounters
Version: 2.5
uid resource held maxheld barrier limit failcnt
175: kmemsize 4759207 5394432 14372700 14790164 0
lockedpages 0 0 2048 2048 0
privvmpages 45846 47872 786432 786432 0
shmpages 769 1745 21504 21504 0
dummy 0 0 0 0 0
numproc 39 47 240 240 0
physpages 16177 17402 0 2147483647 0
vmguarpages 0 0 524288 524288 0
oomguarpages 5910 5912 26112 2147483647 0
numtcpsock 10 10 360 360 0
numflock 19 22 188 206 0
numpty 1 2 100 100 0
numsiginfo 0 27 256 256 0
tcpsndbuf 101160 101160 1720320 2703360 0
tcprcvbuf 163840 163840 1720320 2703360 0
othersockbuf 8992 46608 1126080 2097152 0
dgramrcvbuf 0 1224 262144 262144 0
numothersock 93 101 120 120 0
dcachesize 1137018 1151802 3409920 3624960 0
numfile 656 755 9312 9312 0
dummy 0 0 0 0 0
dummy 0 0 0 0 0
dummy 0 0 0 0 0
numiptent 20 20 128 128 0

【OpenVZ】numproc

コンテナ内のプロセス数の最大値を設定するパラメータ。

上記サイトを参考に理論上の制限を確認。

[root@***** ~]# cat /proc/sys/kernel/threads-max
62341

大丈夫そうなのでとりあえず1000に設定してみる。

ホスト側で以下を実行

[root@localhost ~]# vzctl set 175 --numproc 1000:1000 --save
UB limits were set successfully
CT configuration saved to /etc/vz/conf/175.conf

コンテナ側で確認。

[root@***** ~]# cat /proc/user_beancounters
Version: 2.5
uid resource held maxheld barrier limit failcnt
175: kmemsize 4763303 5394432 14372700 14790164 0
lockedpages 0 0 2048 2048 0
privvmpages 45846 47872 786432 786432 0
shmpages 769 1745 21504 21504 0
dummy 0 0 0 0 0
numproc 39 47 1000 1000 0
physpages 16180 17402 0 2147483647 0
vmguarpages 0 0 524288 524288 0
oomguarpages 5913 5913 26112 2147483647 0
numtcpsock 10 10 360 360 0
numflock 19 22 188 206 0
numpty 1 2 100 100 0
numsiginfo 0 27 256 256 0
tcpsndbuf 101160 101160 1720320 2703360 0
tcprcvbuf 163840 163840 1720320 2703360 0
othersockbuf 8992 46608 1126080 2097152 0
dgramrcvbuf 0 1224 262144 262144 0
numothersock 93 101 120 120 0
dcachesize 1137018 1151802 3409920 3624960 0
numfile 656 755 9312 9312 0
dummy 0 0 0 0 0
dummy 0 0 0 0 0
dummy 0 0 0 0 0
numiptent 20 20 128 128 0

あがってるので良いはず。

【openVZ】ホスト側コンテナの場所を変更する

openVZのホスト側コンテナの場所を変更する

■デフォルトコンテナの位置を変える
サーバの容量の都合で場所変えたくなったりする。

#vim /etc/vz/vz.conf

## Defaults for containers
VE_ROOT=/vz/root/$VEID
VE_PRIVATE=/vz/private/$VEID

↓以下に変更した

## Defaults for containers
VE_ROOT=/home/vz/root/$VEID
VE_PRIVATE=/home/vz/private/$VEID

これで次回以降作成するコンテナは/home側に作られる。

■各コンテナの設定ファイルの場所

/etc/vz/conf

※実際はシンボリックだった

# pwd
/etc/vz

# ll
合計 20
lrwxrwxrwx. 1 root root   23  3月 15 20:01 2012 conf -> ../sysconfig/vz-scripts
drwxr-xr-x. 3 root root 4096  3月 15 20:01 2012 dists
-rw-r--r--. 1 root root  739  1月 15 04:52 2012 download.conf
drwxr-xr-x. 2 root root 4096  1月 15 04:52 2012 names
-rw-r--r--. 1 root root  345  1月 15 04:52 2012 osrelease.conf
-rw-r--r--  1 root root 1335  3月 26 13:36 2012 vz.conf

■久しぶりにコンテナ立てたのでその時の作業ログ

□コンテナ作成
[root@localhost ~]# vzctl create 175 --ostemplate centos-6-x86 --config basic
Creating container private area (centos-6-x86)
Performing postcreate actions
CT configuration saved to /etc/vz/conf/175.conf
Container private area was created

□起動設定
[root@localhost ~]# vzctl set 175 --onboot yes --save
CT configuration saved to /etc/vz/conf/175.conf

□host名設定
[root@localhost ~]# vzctl set 175 --hostname openvz.example.com --save
CT configuration saved to /etc/vz/conf/175.conf

□IPアドレス設定
[root@localhost ~]# vzctl set 175 --ipadd 192.168.1.175 --save
CT configuration saved to /etc/vz/conf/175.conf

□ソケット設定
[root@localhost ~]# vzctl set 175 --numothersock 120 --save
CT configuration saved to /etc/vz/conf/175.conf

□ネームサーバ設定
[root@localhost ~]# vzctl set 175 --nameserver 192.168.1.1 --save
CT configuration saved to /etc/vz/conf/175.conf

□コンテナ起動
[root@localhost ~]# vzctl start 175
Starting container ...
Container is mounted
Adding IP address(es): 192.168.1.175
Setting CPU units: 1000
Container start in progress...

□rootパスワード設定
[root@localhost ~]# vzctl exec 175 passwd
New password: ルートパスワード設定
Retype new password: ルートパスワード設定
Changing password for user root.
passwd: all authentication tokens updated successfully.

□言語設定
[root@localhost ~]# vzctl exec 175 'echo LANG="ja_JP.UTF-8" > /etc/sysconfig/i18n'

□時間設定
[root@localhost ~]# vzctl exec 175 'mv /etc/localtime /etc/localtime.org'
[root@localhost ~]# vzctl exec 175 'ln -s /usr/share/zoneinfo/Asia/Tokyo /etc/localtime'

□HDD容量設定
[root@localhost ~]# vzctl set 175 --diskspace 100G:105G --save

□メモリ設定
[root@localhost ~]# vzctl set 175 --vmguarpages $((256 * 2048)) --save
UB limits were set successfully
CT configuration saved to /etc/vz/conf/175.conf
[root@localhost ~]# vzctl set 175 --privvmpages $((256 * 3072)) --save
UB limits were set successfully
CT configuration saved to /etc/vz/conf/175.conf

□容量増やしたのにinode増やしてなくてエラーでので増量
[root@localhost ~]# vzctl set 175 --diskinodes $(( 200000*3 )):$(( 220000*3 )) --save

□コンテナの稼動状況
[root@localhost ~]# vzlist -a
      CTID      NPROC STATUS    IP_ADDR         HOSTNAME
      ・・・
       175         38 running   192.168.1.175   openvz.example.com
	・・・

ネットワークが切れている時がある

ネットワークの動作が不安定になる(Windows 7)

windows7のPCでスクリーンロックして離席して
戻ってきたときにネットワークが切れていることが
たまにあった。

調べてみると以下のページを発見。

ネットワークの動作が不安定になる(Windows 7)

設定を変更した際にネットワークが一旦切断されるので
作業中のファイルなどは閉じておいたほうが安全です。

自分のPCでは「省電力イーサネット」という表記でした。

今のところ快調。

php expectのインストール

ちょっと自動化ツールの兼ね合いでローカル環境にphp expectを入れる。

# pecl install channel://pecl.php.net/expect-0.3.1

今回はgccとtcl-develが無くてインストールできなかったので

yum install gcc tcl-devel

その後もう一回やったら入った。

64bit版はrpmもあるようなのでrpmで入れる場合は以下のサイトとかから取得してインストールしてもいいかもしれない。
opennac-php-pecl-expect